Piedmont Addition · Part 1 of 3

Alex Pell
Owner, Beyond Green Construction · 7 min read
The short answer
This bathroom tile layout started with the tile itself: we bought it during pre-construction, about seven months before installing it, and framed the room to its actual dimensions. We even ordered the window to fit it, so the walls, the window and the pony wall all came out to an exact number of full tiles, and every fixture sits centered on a tile or on a grout line. I’d do it again, with more time in the estimate for setting the client’s labeled layout.
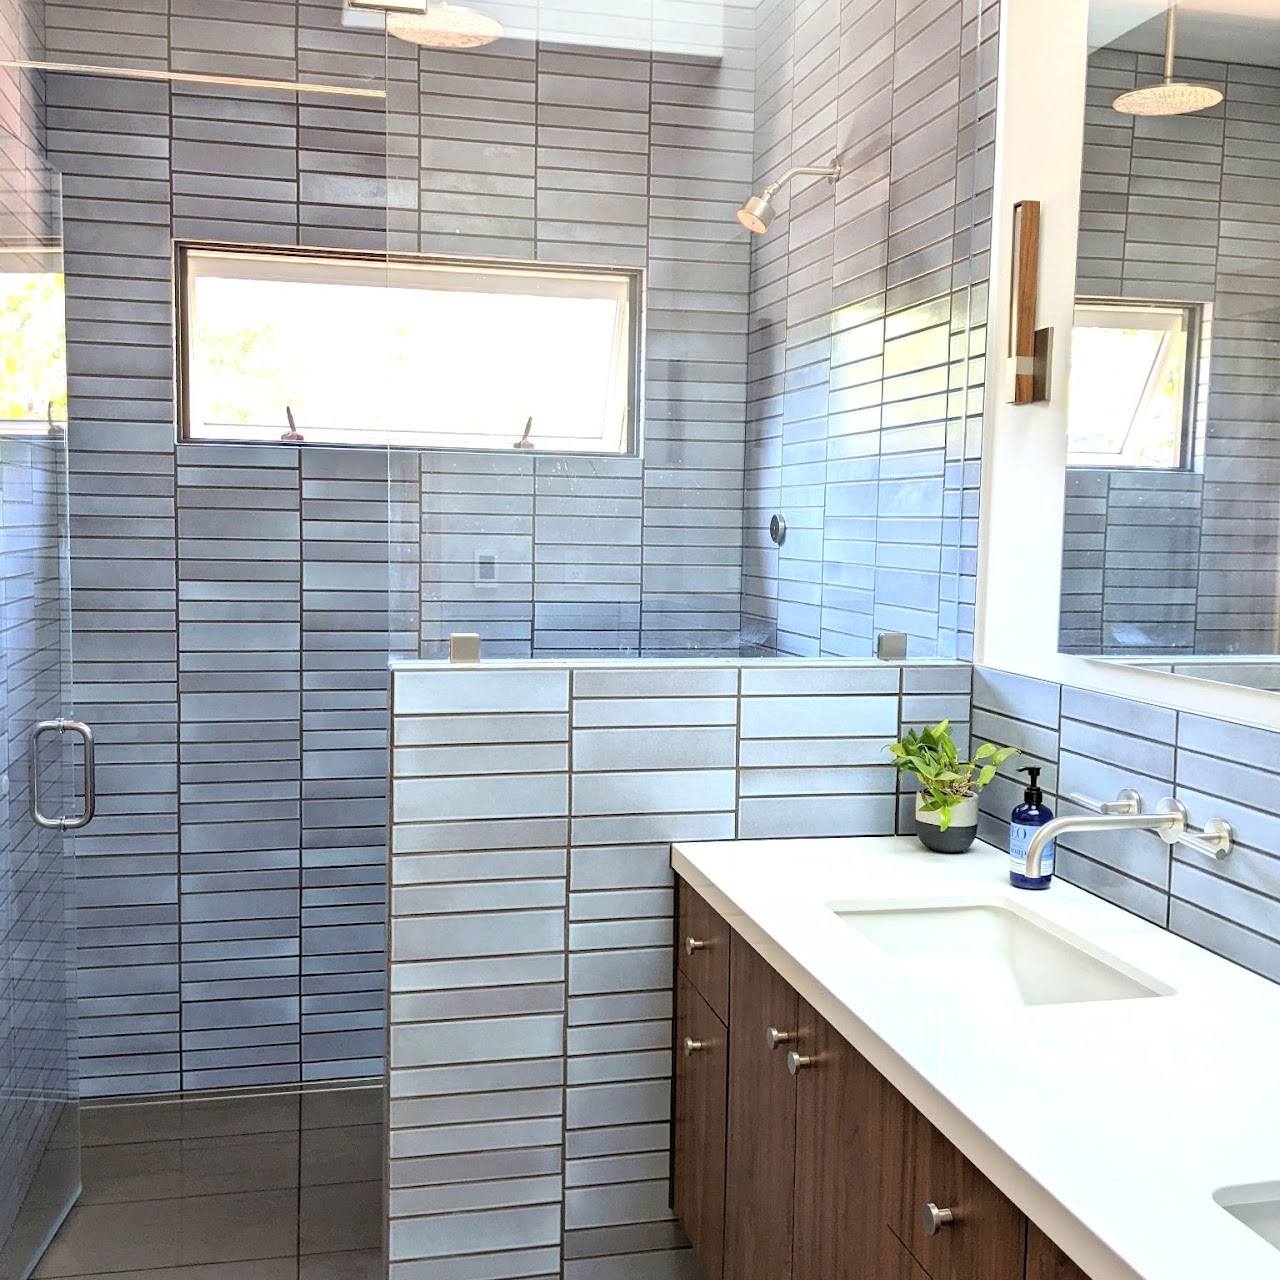
The client wanted full tiles
This was our 2021 Piedmont addition, a 475-square-foot primary suite with a new full bath built from scratch. That meant the bathroom’s dimensions were still ours to set. My client had a specific request: full tiles, with as few cuts as possible.
That request touched the whole room. The length of every wall, the height of the pony wall and the size and position of the window all had to work with the tile. So did every fixture. We could plan for all of it because the client brought it up at the beginning, before anything was framed.
They chose handmade blue tile from Heath, a local Bay Area maker, in two sizes: 2 by 12 inches and 3 by 12 inches. Because every piece is made by hand, the color isn’t flat. It shifts and shades across each tile, and no two are quite the same. You can see it in the photos. The tile ran horizontally in a stacked pattern, with a random mix of the two heights: 70 percent 2 by 12 and 30 percent 3 by 12.
Handmade tile like this is a finish choice. Finishes decide where you land inside a bathroom remodel’s cost range; the layout and the plumbing behind it set the range itself.
We bought the tile seven months early
We bought all of it during pre-construction, about seven months before we installed it.
That sounds like plenty of time. It barely was. Had the tile arrived three weeks later, we would have had to frame the walls and just do our best. Instead, we had the actual tile in hand when we framed, and we framed to an eighth-inch tolerance.
The distinction matters. A tile name and a nominal size tell you what someone intends to buy. A “12-inch” tile might really be 11 7/8, and once you add the grout joint, nothing lands on a round number. So nothing in this room did either. The pony wall was 48 inches on paper and about 48 3/8 in reality. When the room’s dimensions depend on the tile, you need the real thing to measure, not the spec sheet.
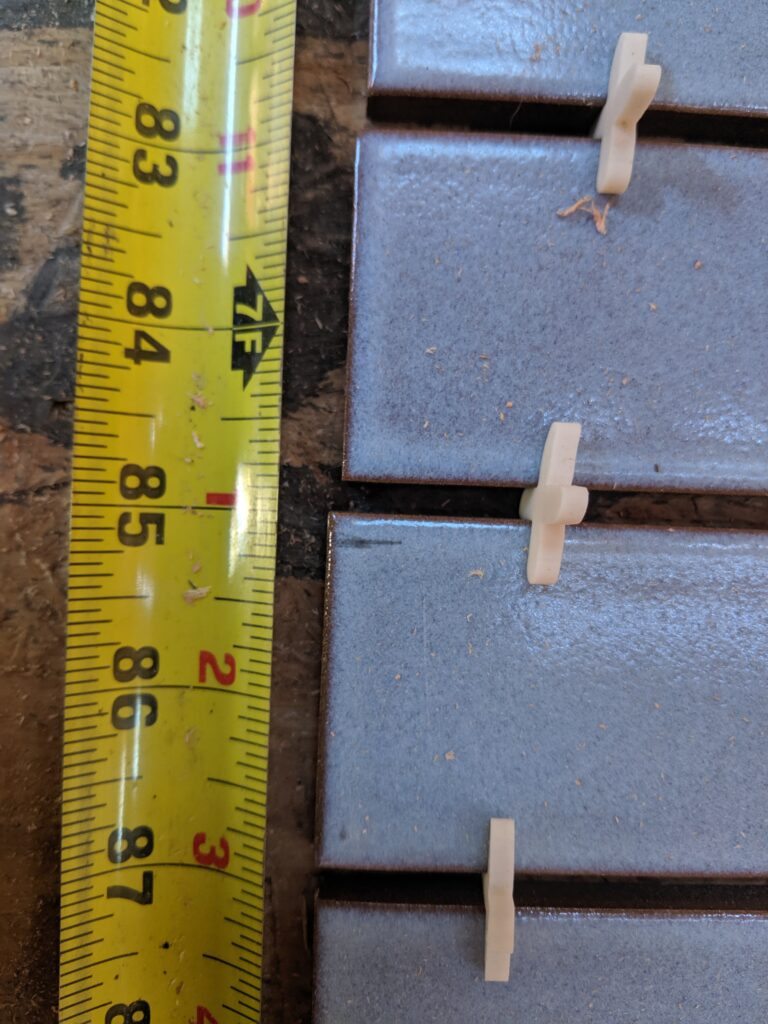
Two tile heights, only so many combinations
With two heights, every row is either a 2-inch course or a 3-inch course. A wall is just a sequence: 2, 2, 2, 3, 3. Or 3, 3, 3, 2. Or 2, 2, 2, 2, 3, 3. Plenty of sequences add up to something. Only some add up to the height you need.
The story pole is how we kept track. It’s a straight board marked with the real courses and joints, so you can hold it against the framing and see exactly where each row lands. We used it to set the heights of everything else in the room.
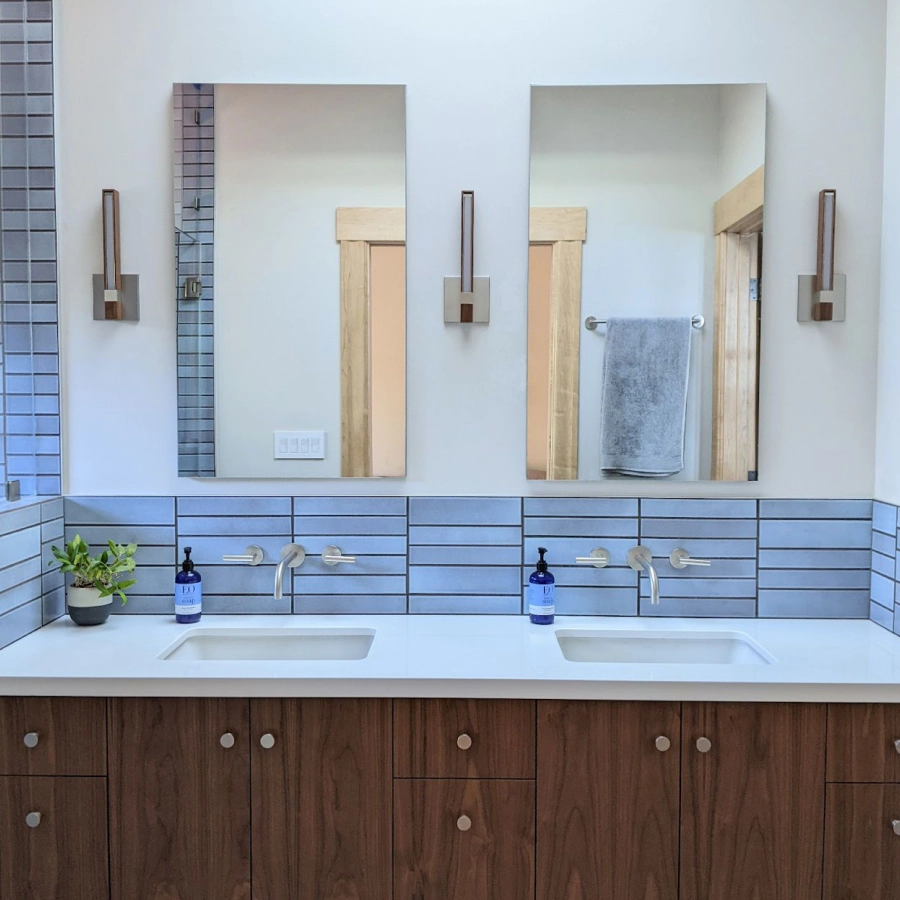
Above the vanity, only a few combinations of 2s and 3s fit the height we needed, and every column had to be one of them. The mix still had to look random. It just had to be one of the sequences that fit.
The bathroom tile layout set the framing
We built the bathroom seven tiles in one direction and four in the other. Both sizes are nominally 12 inches long, so seven tiles sounds like seven feet. It wasn’t exactly seven feet. We framed to the real dimension of seven tiles and their joints.
The window was the hardest part. We ordered it to the tile: its width and height came straight off the real layout, so full tiles run all the way around it, with an exact number of rows up to the sill, an exact number to the head, and full tiles on both sides. That was trickier than setting the plumbing at the right height. A valve can still move in an open wall. A window, once it’s ordered, is the size it is.
The only cut pieces at the window were the returns, the tiles that turn into the opening. The pony wall height landed on a whole number of tiles, too.

Then the fixtures. Every one landed either centered on a tile or right on a grout line. That only works if you know where the tiles will be before the plumbing and electrical go in.
The few cuts we did make were at the ends of the walls, where the tile met the Schluter vertical edge trim. A couple of pieces there couldn’t be full. That’s it.
By the time someone is setting tile, a window size or a wall position is an expensive thing to reconsider. We settled those relationships while they were still lines on a plan and studs on the floor.
Every tile had an assigned place
The dimensions were one part of the job. The look of the individual tiles took another kind of planning.
These tiles had darker and lighter spots. Some pieces had defects, too, but spotting a defect only covers part of what the client cared about. How one tile looked beside another was a matter of preference.
A tile setter can recognize a defect. Knowing exactly which variation the client wants in a particular spot is a more personal judgment. This client understood that and was willing to put their own time into it.
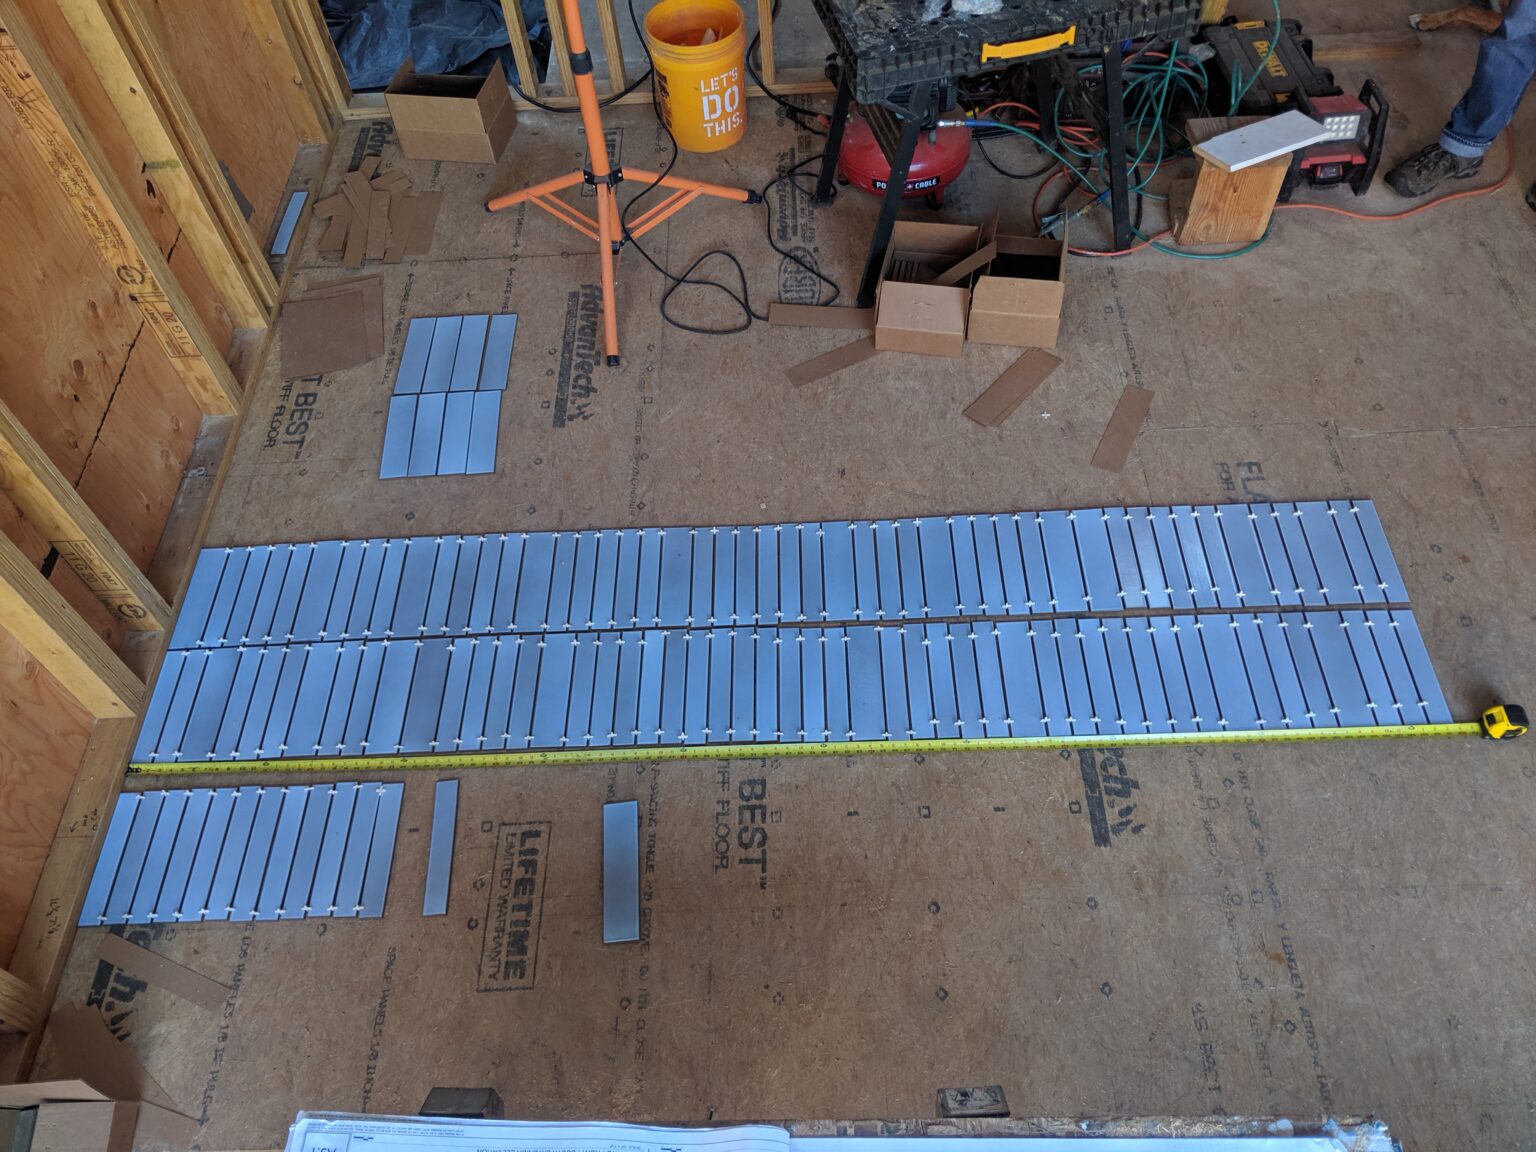
They laid out all three walls on the subfloor before installation, worked through the arrangement themselves, then used a label maker to mark every single tile.

Every tile.
That gave us a specific arrangement to install. Their preferences became instructions we could follow.
The work I underestimated
The client put the time into laying out and labeling the tile. We still had to move that arrangement from the subfloor onto the walls.
We had to restack the tiles, keep them in order and install them in the intended sequence. Each labeled piece had an assigned position, and keeping that order made setting slower and more demanding.
I underestimated how much time that would take.
That’s the part I’d price differently next time. The client’s time choosing the arrangement and our time carrying it out were both necessary. The finished work was worth it. I’d do it again, with an estimate that covers it.
What I’d tell anyone planning a custom bathroom
- Tell your builder what you want to line up. A window, a pony wall, the fixtures and the tile pattern all affect one another. We need to know those priorities while the dimensions can still change.
- Have the actual tile before framing or rough-in. Choosing it isn’t enough. Whether we’re framing new walls or just setting the plumbing and electrical, those locations should come from the real tile. We bought this order seven months ahead, and it still arrived with about three weeks to spare.
- Make personal preferences visible. If the placement of individual handmade tiles matters to you, laying them out lets you settle the arrangement before it goes on the wall.
- Allow time to carry out the details. Sorting, labeling, restacking and following a fixed sequence all take work. A client doing the selection doesn’t remove the time needed to install it.
The verdict
Buy the tile early, frame the room to the real thing and price the time to set it the way the client laid it out. I’d build it this way again. This is what a custom bathroom actually means.
These are the details we work through early when planning a bathroom remodel.
FAQ
How early should you buy tile for a bathroom remodel?
Before framing or rough-in, and earlier than you think. On this project, we bought all the tile during pre-construction, about seven months before installing it, and it arrived with only about three weeks to spare. Having it in hand let us frame the walls and window to its real dimensions.
What does a story pole do in a tile layout?
It’s a board marked with the real tile courses and joints. We hold it against the framing to see where each row will land and use it to set heights like a window sill or a pony wall. With two tile heights, it also shows which combinations of rows actually add up.
Can you design a bathroom with no tile cuts?
Close. In this bathroom, the walls, window and pony wall were all sized to full tiles. The only cuts were the tiles that returned into the window opening and a few pieces at the ends of the walls, where the tile met the edge trim.
Does a client doing the tile layout save installation time?
Not in our experience. The client took on the work of choosing the arrangement. We still had to restack, organize and install every tile in order, and that took more time than I had allowed for.
More from this job
Piedmont Addition
- We ordered the window to fit the tile (you’re reading it)
- The plumbing lesson I learned the hard way
- Why trim joints open up, and why I preassemble casing
About the author
Alex Pell
I grew up in the Colorado mountains, the kid rebuilding CD players and racing a dog sled I’d built myself. (My great-grandfather held more than 100 patents; it runs in the family.) I was on my first jobsite at 17, building straw bale homes, then apprenticed as a carpenter, electrician and plumber, and started Beyond Green in 2017. Here I write about what’s behind the finished photos: the calls forced by budget, code and the site, and the ones that come from 25 years of seeing what holds up and what doesn’t.
The project
Piedmont Addition
475 sq ft addition: primary suite and full bath
Facing a decision like this on your own project?
Talk it through with Alex on a free 15-minute call.
Book a 15-minute call (510) 239-7589